
[Full Guide] How to Get Low Ping in Fortnite on Windows 10/11?
If you are the one who wonders how to get a low ping on Fortnite and how to get 0 pings on Fortnite PC, you have come to the right place. You’ll find the most useful tips and tricks on that in this article on the MiniTool Website. Without further ados, let’s start the topic at once.
What Is Ping in Fortnite?
Ping is the latency between the game server and your client. The lower the ping is. The less time it will take for you to respond to the server and the less latency you will receive. Therefore, reducing ping when gaming is very important. In this guide, you’ll find the most detailed guidelines on how to get low ping in Fortnite to have a better game experience.
How to Get Low Ping in Fortnite?
In terms of different situations, we come up with corresponding solutions for you. Now, let’s jump into the solutions below.
Solution 1: Disable Background Applications
Before playing any games like Fortnite, it is highly recommended to shut down any programs running in the background because they will drain your network more or less thus causing high latency in gaming. Here’s how to do it:
Step 1. Right-click on the taskbar to choose Task Manager.
Step 2. In the Processes tab, do right-click on every process which is irrelevant to Fortnite and choose End task.

Solution 2: Rechoose a Game Server
How to lower ping in Fortnite PC? The second method is to rechoose a more suitable server. Fortnite allows you to choose and change servers, so if you are encountering high latency now, you can choose to tweak a server. You should navigate to the Settings menu, change the watching-making region and select the region that is the nearest to your home.
Solution 3: Optimize Network Adapter Settings
Changing your internet adapter allows you to enjoy the best performance when playing Fortnite and you are also supposed to connect your internet via Ethernet.
Step 1. Press the gear icon to open Windows Settings.
Step 2. Scroll down in the Settings menu to choose Network & Internet.
Step 3. In Status, click on Network and Sharing Center.
Step 4. Click the blue font Ethernet.
Step 5. Hit Properties > Configure > Advanced.
Step 6. Now, you can change the network adapter settings according to the following content:
- ARP Offload – Disabled
- ECMA – Disabled
- Energy Efficient Ethernet – Disabled
- Flow Control – Disabled
- Interrupt Moderation – Disabled
- IPv4 Checksum Offload – Disabled
- Jumbo Frame – Disabled
- Maximum Number of RSS Queues – Depends on the number of cores your CPU has. You can check this by going to Task Manager and selecting the Performance tab. Select 4 RSS Queues if your CPU has 4 or more cores. Select 2 RSS Queues if your CPU has 2 cores
- Network Address – Not Present
- NS Offload – Disabled
- Receive Buffers – 1024
- Receive Side Scaling – Enabled
- Shutdown Wake Up – Disabled
- Speed & Duplex – Select the highest Mbps available and Full Duplex. For most this will be 100 Mbps Full Duplex
- SWOI – Disabled
- TCP Checksum Offload – Disabled
- Transmit Buffers – 1024
- Wake on magic packet – Disabled
- Wake on pattern match – Disabled
Solution 4: Change DNS Servers
To get lower ping in Fortnite in an efficient and safe way, you need to upgrade to a better DNS server. To do so:
Step 1. Go to Settings > Network & Internet > Status > Network and Sharing Center.
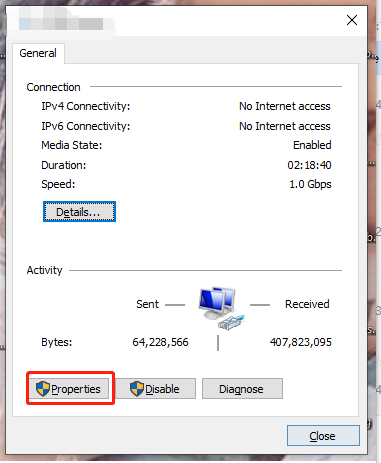
Step 2. Click on Change adapter settings, open the adapter that you use and right-click on it to choose Properties.
Step 3. Under Networking, locate TCP/IPv4 (Internet Protocol Version 4) and double-click it.
Step 4. Check to Use the following DNS server addresses and change the Preferred DNS server into 1.1.1.1 & Alternative DNS server into 1.0.0.1.
Step 5. Tap on OK to save the changes.
Now, you need to clear the DNS Resolver Cache.
Step 1. Type cmd to locate Command Prompt and right-click it to choose Run as administrator.
Step 2. Type ipconfig /flushdns in the command window and hit Enter. Exit Command Prompt until you see “Successfully flushed the DNS Resolver Cache”.


.jpg)


.jpg)
No comments: